How to secure anything accessible online with CloudFlare Tunnels
In today’s connected world, almost every service we run ends up needing some form of secure remote access. Whether it’s a self-hosted dashboard, automation tool like n8n, or even a private web app, the challenge is always the same: how do you expose it to the internet without opening up your server to unnecessary risk?
TL;DR - Quick Setup Summary: Securing Services with Cloudflare Tunnel
- Create a Tunnel
- Log into the Cloudflare Zero Trust Dashboard.
- Go to Networks → Tunnels → Create a tunnel.
- Name it (e.g.
n8n-local) and copy the install script for Debian onto your server. - Run the script to install & authenticate
cloudflared.
- Set Public Hostname
- Add a subdomain (e.g.
n8n.yourdomain.com). - Choose Service Type: HTTP and point it to your local service (e.g.
http://localhost:5678). - Save — your tunnel is now live, no port forwarding needed.
- Add a subdomain (e.g.
- Enable Zero Trust Access
- In Cloudflare Zero Trust, set up your organisation and team domain.
- Under Authentication → Login Methods, add Google as a login option with your App ID & Secret.
- Protect Your Application
- Go to Access → Applications → Add an application → Self-hosted.
- Enter the app name and domain (e.g.
n8n.yourdomain.com). - Create a policy:
- Allow → Specific Google email(s).
- Require → Chosen login method, optional country restriction.
- Save — your service is now gated behind Google login.
This is where Cloudflare Tunnels come in. Instead of fiddling with port forwarding, VPNs, or complicated reverse proxy setups, Cloudflare Tunnels provide a simple yet powerful way to make your local applications securely accessible from anywhere. By routing traffic through Cloudflare’s global edge network, you gain enterprise-grade security features - like DDoS protection, SSL encryption, and identity-based access control - without the overhead of traditional networking setups.
For developers, small businesses, and even hobbyists running home labs, Cloudflare Tunnels offer a reliable solution to "secure by default" access. You can expose services to the world without ever exposing your actual server IP, dramatically reducing your attack surface while making access seamless.
In this guide, I’ll walk you through the exact steps to set up a Cloudflare Tunnel for your own service (I’ll use n8n as the example), and then go one step further - showing you how to lock it down with Zero Trust Access and Google Login so only approved users can get through.
1. 🌐 Create a Cloudflare Tunnel (Using the Dashboard)
Firstly, you will need a CloudFlare account - if you don't have one, make sure to sign up on their website - once you have signed up, configure 2FA to secure your account, and then proceed to add a new domain (assuming you have one already). This guide will not cover how to add a domain in CloudFlare so we'll continue.
We’ll use Cloudflare’s Zero Trust dashboard which manages most of the complexity for you. I originally followed some of the steps in 🔗 King_Samuel_David's post on the n8n forums to get this working
a. Log in to Cloudflare
Go to:🔗 CloudFlare Zero Trust Dashboard - here you can access everything related to zero trust policies and applications.
b. Create a New Tunnel
- Navigate to Networks > Tunnels in the Zero Trust dashboard.
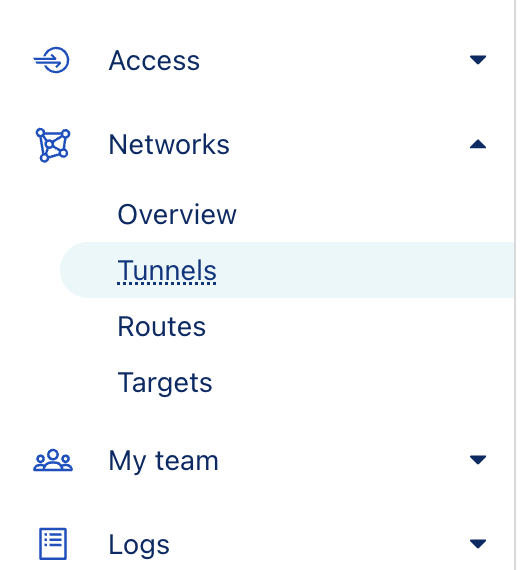
- Click Create a tunnel and select Cloudflared as the tunnel type
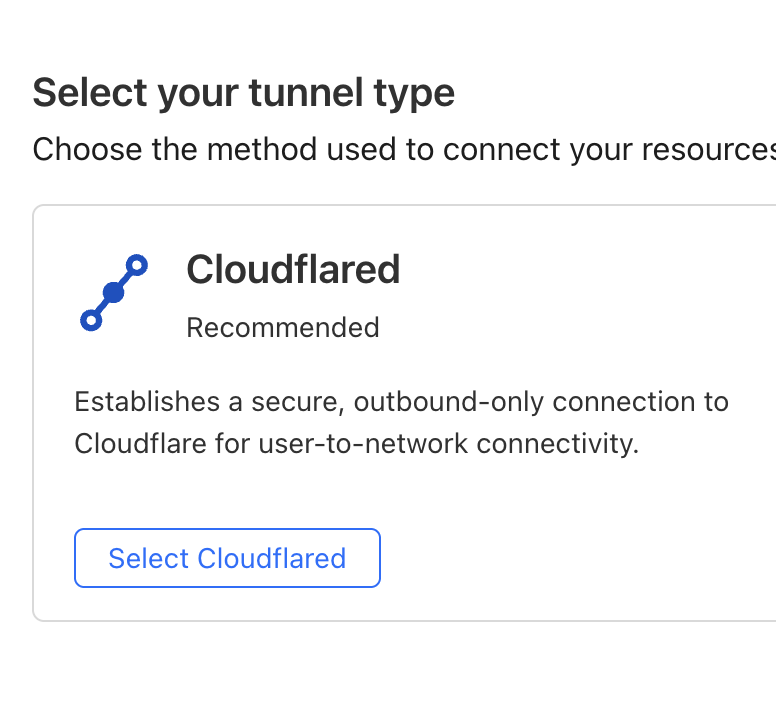
Creating the tunnel
- Give your tunnel a name (e.g.,
n8n-local) and click Save tunnel. - On the next screen, Cloudflare will offer you an installation command for your system. Choose:
- "Debian"
- Copy and paste the entire script into your Raspberry Pi’s terminal to install
cloudflaredand authenticate it.
- Once authenticated, return to the dashboard and click Next.
c. Set the Public Hostname
- Add a Public Hostname:
- Subdomain: e.g.,
n8n - Domain: select your Cloudflare-managed domain
- Service Type:
http - URL:
http://n8n.local:5678orhttp://<ip-address>:5678
- Subdomain: e.g.,
Click Save. The tunnel will now be live and accessible at:
https://n8n.yourdomain.com
No port forwarding or dynamic DNS required! But wait, we're not done yet...
2. 🔒 Add Zero Trust Access with Google Login
Let’s restrict access so only approved users can access the tunnel URL.
a. Enable Zero Trust
If you haven’t already:
- Go to https://dash.cloudflare.com
- Choose your account → Zero Trust
- Set up your organisation name and team domain if you don't already have it (e.g.,
your-name.cloudflareaccess.com)
b. Add Google as a Login Method
- Navigate to Settings → Authentication
- Scroll to Login Methods
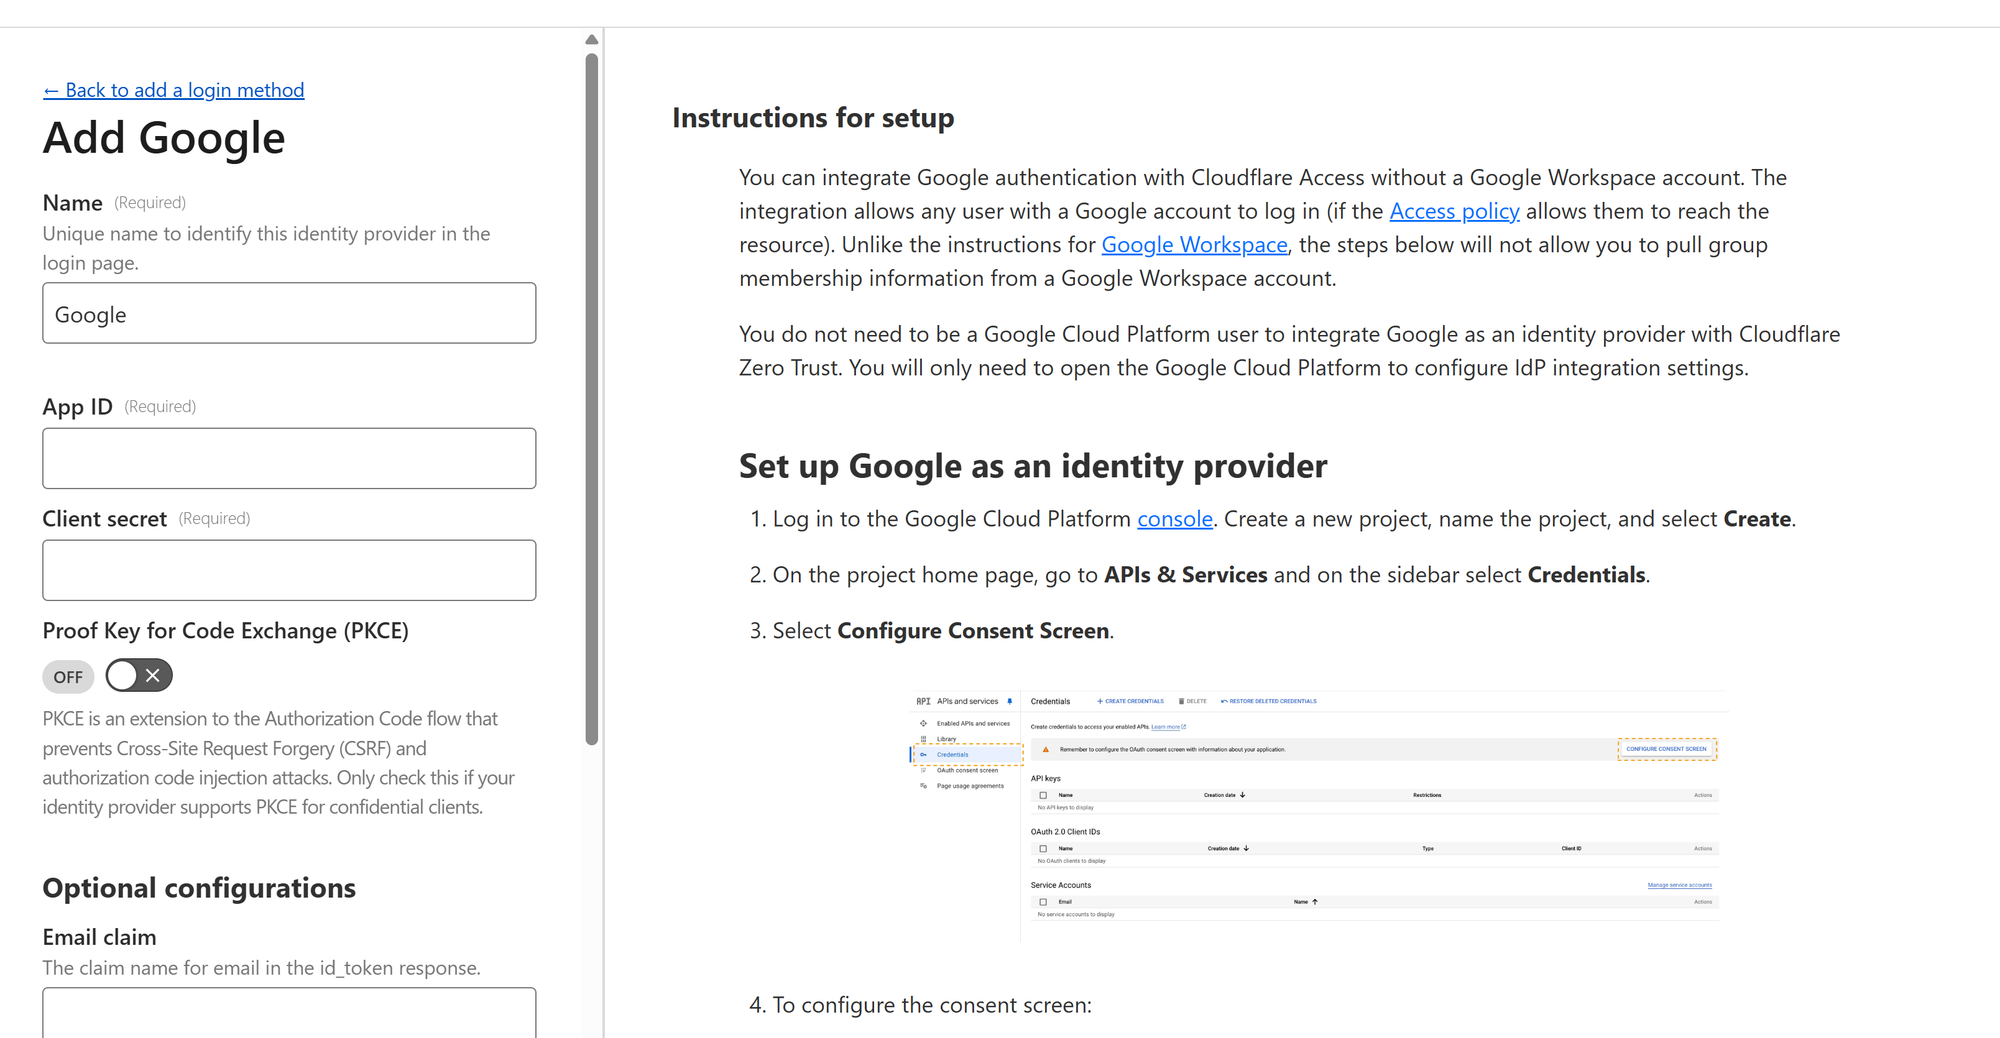
- Click Add new, then choose Google
- Set a name (e.g.,
Google) - You'll require an
App IDand aClient Secret- follow the instructions displayed on how to obtain this via Google Cloud Console.
Once you've completed the step successfully, you can save the login method and it's ready to use in a security policy which you will apply to an application in CloudFlare (in our case it's the n8n instance).
c. Create a Cloudflare Access Application
- Go to Access → Applications
- Click Add an application
- Choose Self-hosted
- Fill in:
- Name:
n8n - Domain:
n8n.yourdomain.com
- Name:
- Click Next
d. Create a Policy
- Under Policies, click Add a policy
- Policy name:
Allow Google Users - Action: Allow
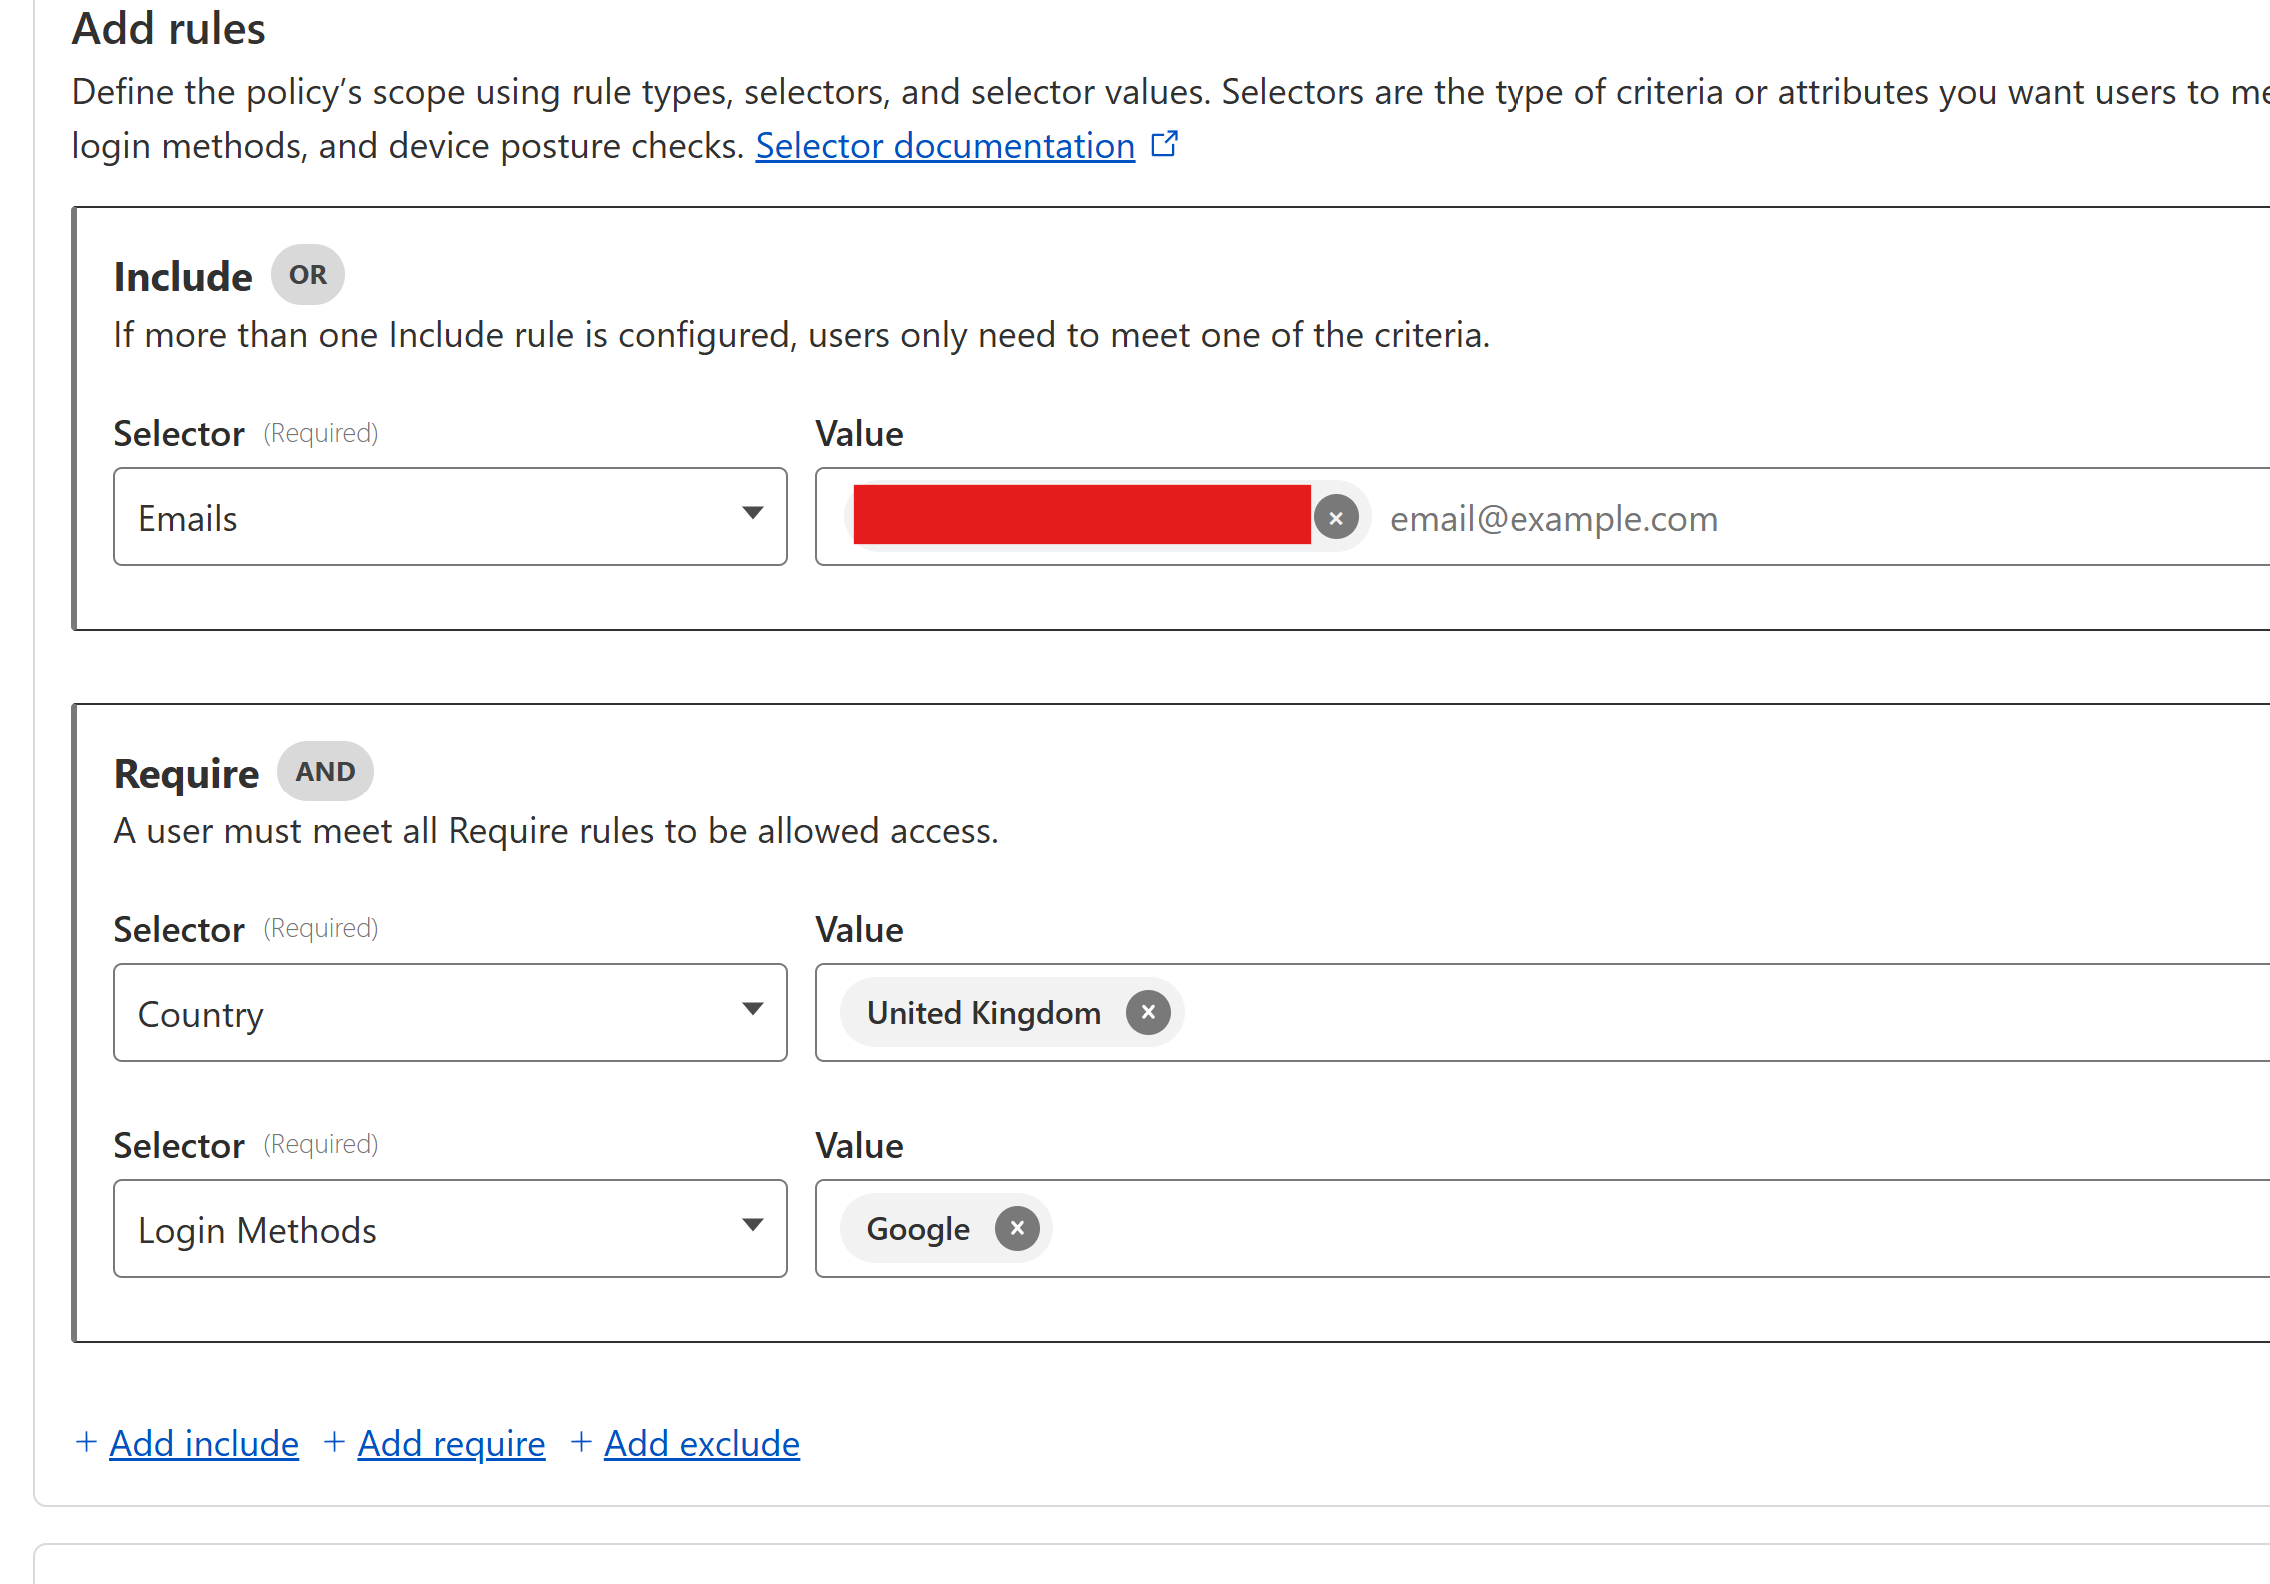
- Include → Emails where the value is your email address you want to use for authentication (Gmail address)
- Require → Country - set to your country; Login Methods - choose your newly added Google login method.
- Leave session expiration as 24 hours.
- Save policy and finish setup
It should look something like below:
Try out the policy tester below to ensure your Google login method works.

Congratulations!
You've secured your application and can access it online anywhere in the world, and you have the full protection of CloudFlare. I am strong believer and supporter of CloudFlare and I recommend you follow the CloudFlare Blog to keep up to date with their new offerings.
Comments ()